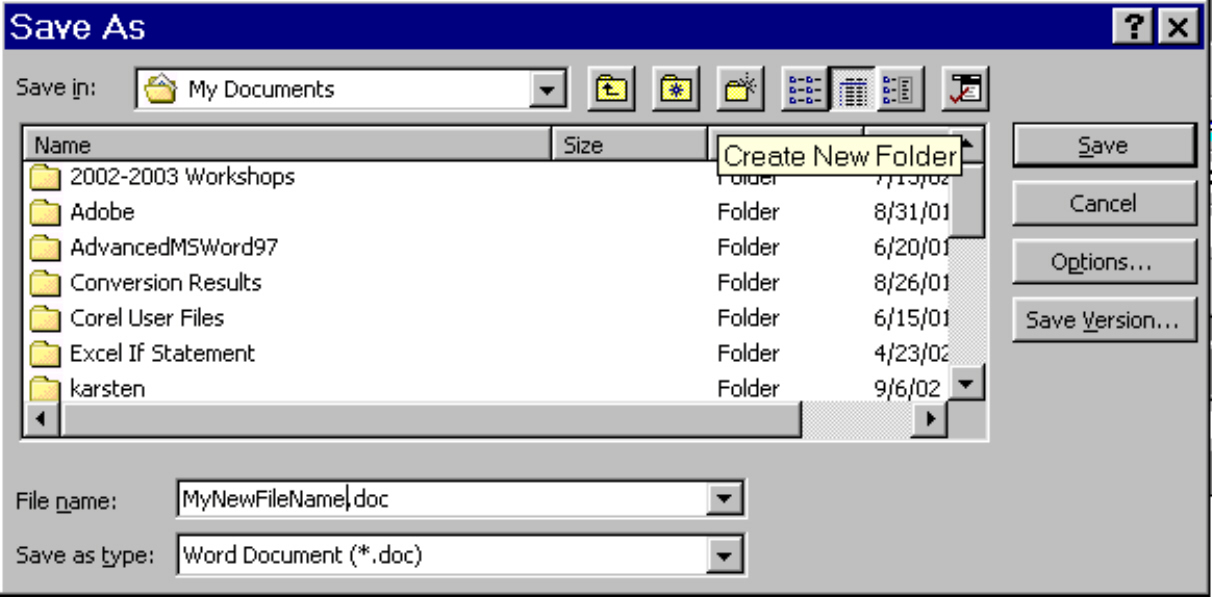
Creating a New Folder
 Activity
Handout Three: File management
Activity
Handout Three: File management
| Making Folders and Files | Backing Up Folders and Files |
| Keyboard Commands | CD ROM & Zip Drives Review |
A folder is a container (or place on your C drive) for files or other folders, or both. To make a new folder on the hard drive:
Exercise: Creating a Folder
1. Double click My Computer to open the window.
2. Double click C:
3. Click the menu called File
4. Click New, then Folder. A new folder will be added to the end of the list of files in this window.
5. To name this new folder immediately, simply type in a name (your first name for example) and press the Enter key. The names you give your files and folders can be 1 to 255 characters long, can have a period and extension (this is recommended in software applications), upper and lower case letters, spaces, and some symbols. However there are some symbols which cannot be used to name a file: ? : * " < > \ / |
6. To rename the folder, select it then click on File, slide to and select Rename.
7. Click View, then Refresh, the system will place your folder in the default position in the window.
8. To delete the folder, select it, press the delete key on your keyboard; or drag and drop to the Recycle Bin; or select it then click on File, slide to and select Delete.
Creating a New Folder
Exercise: Creating Files
Go to Start, Programs, Accessories and NotePad - create a file called note1.txt - save it to a Folder you have created in My Documents with your name on it.
Go to Start, Programs, Accessories and WordPad - create a file called word1.doc - save this file to the same folder in My Documents with your name on it.
Re-size the windows for both files so you can place them side by side. Notice the difference between the Toolbars for the two different programs.
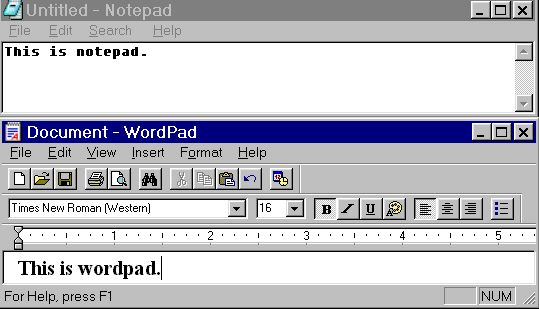
Close both files. Now go to your folder
in My Documents. Double click on the file made with NotePad to
open it. Minimize this file. You will still be able to see the file at
the bottom of your screen. Next double click on the file you created with
WordPad.
What happens? You will now see your file open in WORD. In order
to see it again in WordPad, you would have to go first to the program
WordPad in Accessories then go to FIle and Open.
Files created in NotePad can only
be saved as .txt files, that is they have no special formatting. The WordPad
program has more features. In addition to .doc, you can also save WordPad
or WORD files in .rtf = this is helpful if you are planning to send
the file to a user who has a MAC computer.
Other than creating and organizing files and folders, this is the most important function you can learn. As you will have noticed by now there is more than one way to complete a task in Windows. Any route you choose to follow is correct, as long as it works! Following is one of the most obvious ways to back up a file or a folder, followed by two other methods.
1. You can place a formatted disk in your A: or 3½ Floppy drive, then, from the hard drive (C:) select the file you want to back up, click on File (pull down menu), slide down to Send To and over to 3½ Floppy (A:), click and release.
2. You can also perform this function by using Edit, Copy, double clicking to open the new location, then Edit, Paste.
3. A third method is Drag and Drop. In My Computer, Drag the file or folder from its current location to the icon for the floppy drive. Be sure that the icon for the floppy drive becomes highlighted before you release (Drop) the file into it. This can be awkward until you become more skilled with the mouse.
Exercise: Try all three, noting the dialogue boxes that are presented.
A floppy disk can be damaged and can become too old to be useful (buy new disks as you need them, your work is worth it); treat them gently and protect them from viruses, heat, cold, magnets, moisture, and never remove the disk before the drive light goes out.
Crashes
Because all systems crash from time to time it is vital to save your files while you are working on them and to copy or back them up to the floppy drive or your OISENet email. If your system crashes (the message is usually that you have performed an illegal operation, or freezes (you can see but cannot move the pointer), you need to know how to reboot or restart without shutting off the power. To reboot, hold down the Ctrl and Alt keys, while pressing the Delete key.
Shift and click to select files in sequence
Control and click to select files non
sequentially
Control and file to select individual
files
Control A - selects all
Control C for copy
Control V for paste
Control X - cut
Control S - save
Control Z - undo
Up and Down, Right and Left - use arrow
keys
F! - Help Windows
Win Logo Key - Start Menu
CD-ROM means compact disk
read-only memory. Your internal CD-ROM drive works with CD-ROM
disks, standard audio compact disks (CDs) and single or multi-session
Photo CDs. It is important to remember that ROM stands for read-only
memory, meaning that you cannot write information onto CD-ROM
disks. To play a CD:
1. Press the Open/Close button
to open the tray of the CD-ROM drive and place a disk in the tray,
with the disk label facing up. Push the tray in or press the Open/Close
button to close the tray.
2. From Start, slide up to Programs,
over to Accessories, down to Multimedia, then click on CD
Player.
3. Pass the disk around the room so that
each of you can try this. Explore the CD Player window, noting that
placing the pointer on the symbols to the right of the read out dial provides
a five second word identification of each symbol button. Left click to
engage, or start, a symbol button.
Zip Drive: This drive may be built into the computer as is the A drive or CD ROM drive or it may be connected externally. This drive holds diskettes that can store more data than the average floppy diskette. (10 MB vs 1.5 MB of data). It is commonly used to back up data when there are a large number of files associated with a project.
Create a file - put it in the folder you have created in My Documents and retrieve it.
Naming files (for older applications - 8 character restriction) Using extensions for file names
Create a folder to put it in.
Delete the file. Locate the Recycle Bin. Empty the Recycle Bin.
Working with the file again - copy the file, move the file, delete the file.